Opel Steering Angle Sensor (SAS) Calibration: Tech 2 or Opcom?
The steering angle sensor (SAS) is a critical part of the ESC system that measures the steering wheel position angle and rate of turn. A scan tool can be used to obtain this data in degrees. The SAS is located in a sensor cluster in the steering column.
Opel Tech 2 and Op-com, which is better for SAS reset:
With Tech2 you don’t need a PIN code.
Saab doesn’t have PIN code like Opel.
How to reset Opel steering angle sensor:
Tech 2 steering angle sensor calibration:
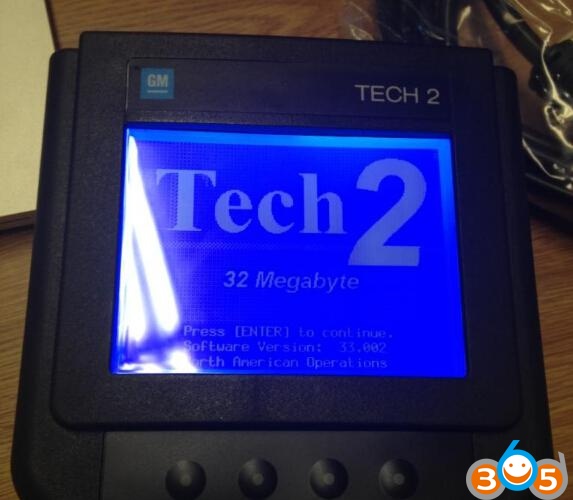
Here is the procedure with Tech2:
Calibrating the steering wheel angle sensor
Note
The wheel alignment must be correct before calibration is carried out.
1. Put the wheels straight ahead.
2. Connect the diagnostic tool.
3. Select Steering Angle Sensor Calibration. Follow the instructions displayed.
4. Read and clear diagnostic trouble codes.
5. Test drive the vehicle.
Op-com steering angle sensor calibration:
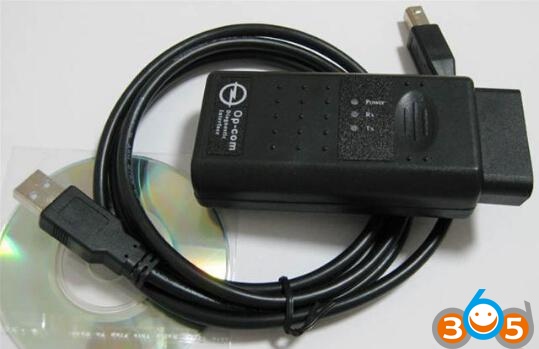
- 1. Disconnect the battery and the steering angle sensor lose its basic setting
2. Remove airbag and steering wheel following the usual precautions
3. Move the center rotor of the CIM to align the 2 triangles
4. Connect the op-com interface with computer via USB port than install the software
5. Plug the op-com unit into the vehicle USB port after succeeded installing software
6. Op-com will turn out the ESP light but not very first and second time
7. Turn on the vehicle ignition switch and start the vehicle.
8. Drive in a short distance straight line on a level surface at the speed not higher than 20 km/h.
9. When the steering wheel is straight, stop the vehicle with the wheels pointed straight. Make sure the vehicle is not move again.
10. Come to the op-com main function menu, select “Op-com Diagnostic”>> Vehicle year “2006”>>Vehicle model “Astra-H”>>Body>>CIM (Steering Column Module. >> Measuring block 3>>Steering Angle Sensor offset – set to 0.00 by slightly moving steering wheel
11. Back to the CIM screen, select “Programming”. Enter the security code if the system asks for it. Then click “Yes” when the system accepts the security code.
12. Go back to the programming screen, select “Steering angle calibration”, if the system still showed steering angle calibrated, choose “No, choose Activate and waited”. Otherwise, select “Yes” when the system displays steering angle calibrated.
13. The ESP light then came on with ignition as normal and went out after a few seconds
FAQs: steering angle sensors (SAS)
How long have steering angle sensors (SAS) been in use?
These sensors have been in use on certain vehicles since the early 1990s, but became commonplace by 1998.
Why does the SAS need to be calibrated or reset after a wheel alignment?
Because it is required by the OEM.
When did OEMs begin requiring SAS reset with alignment?
Some as early as 2003, others as recently as 2008, though some 2008 models were specified as early as 2002. Hunter’s WinAlign software has always provided vehicle specific screens that advised technicians that special equipment and software would be required to complete the alignment.
Why am I just now hearing that SAS need service?
Because many newer on-board systems such as electronic stability control and electric power steering rely on accurate input of the driver’s intentions. This input is provided by the SAS)
Why do some OEMs require SAS reset in conjunction with alignment on only particular models or model year of vehicles?
Each OEM has their own specific selection criteria on which vehicles are affected.
Why don’t all OEMs require reset after alignment?
Each OEM has its own service requirement criteria. Most OEMs have only added the requirement in the last few years. Some as recently as 2008.
Does the SAS need to calibrated or reset if thrust angle is not changed during the wheel alignment?
Yes. Thrust angle is only one of many conditions causing the SAS to report a value other than zero when the front wheels are steered straight-ahead based on the thrust angle.
Why do some SAS reset procedures require the vehicle to be driven a given distance to complete the procedure?
Each vehicle manufacturer develops the SAS reset procedure based on the technology and design of the system. In some cases, a test drive is needed for the vehicle’s ECM to verify proper operation. CodeLink will indicate which specific vehicles require a test drive.
Do SAS automatically calibrate themselves after the vehicle has been driven a given distance?
On some vehicles, SAS is automatically calibrated; on other vehicles, it is not. In either case, OEM mandates determine whether SAS reset is required after wheel alignment. Always follow the OEM’s recommended service procedures.
What may happen if the SAS requires calibration or reset and the process is ignored?
A variety of symptoms may result from a SAS reporting inaccurate information. Examples of such symptoms may be a shutdown of the electronic stability control system, untimely application of individual brakes, steering wheel vibration or a vehicle that drifts of pulls in one direction.
Related posts:
- GM Tech2 Disable Alarm on Saab 2003 9-3 review
- GM Tech2 Scanner Clone SP23-C Unbiased Review
- How to Enable Chevrolet Impala Afterblow with GM Tech2?
- GM Saab PSG16 Pump SPS Programming via Tech2
OPCOM OP-COM Reset and Reprogram ECU Guide for Vauxhall Astra H
This is guide about using OP-COM to reset and reprogram Vauxhall Astra H 2004 ECU immobilizer. Get cheap OPCOM V2012 under $20 and you can start to diagnose and program Opel or Vauxhall Vectra-C, Astra-H, Zafira-B…
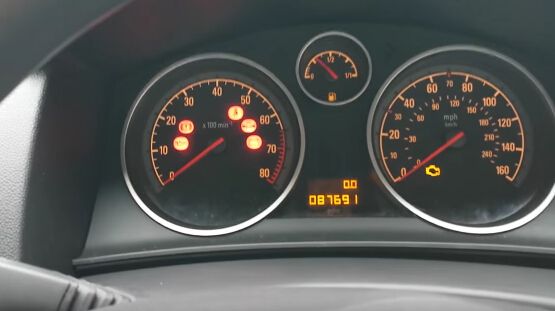
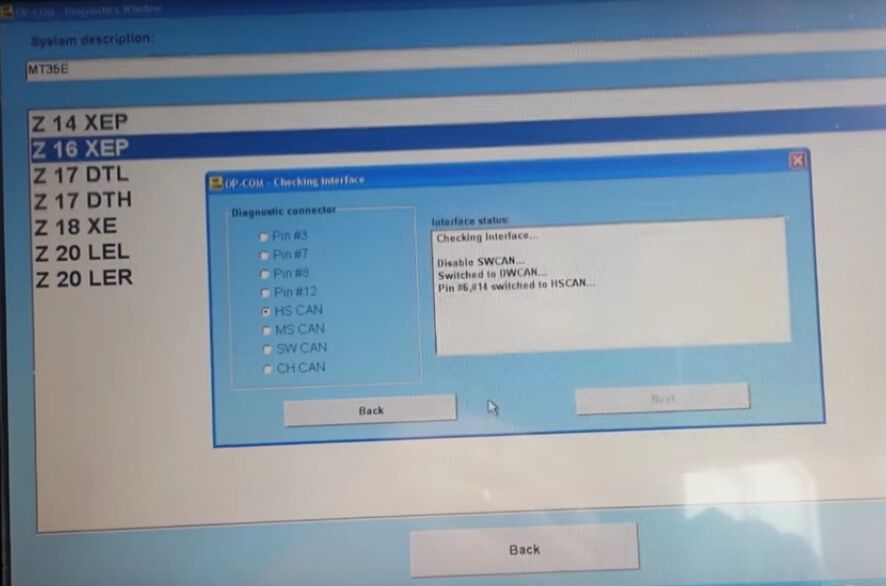
First, connect OPCOM with car and laptop. Open OPCOM software. Choose “2014”→“Astra-H”→ “Engine”→ “Z 16 XEP”
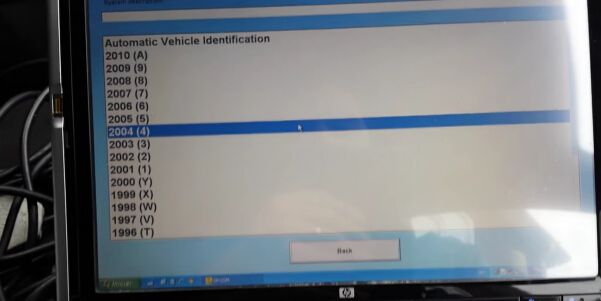
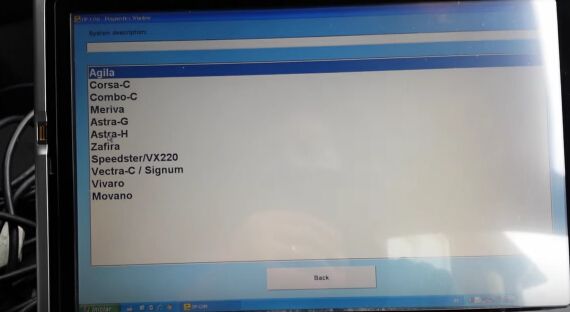
Follow the tip and click “Next”
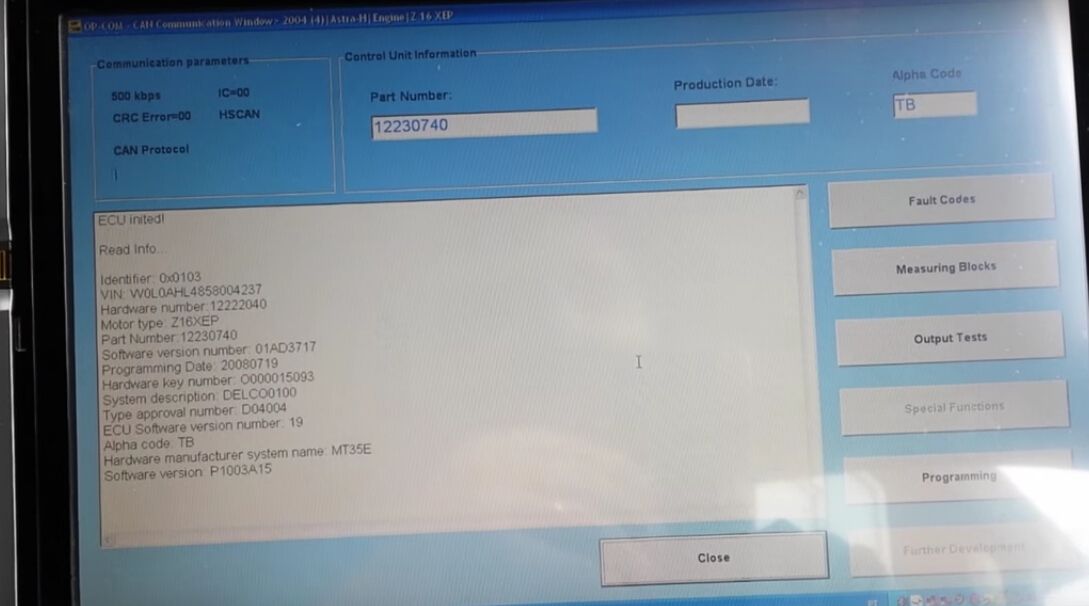
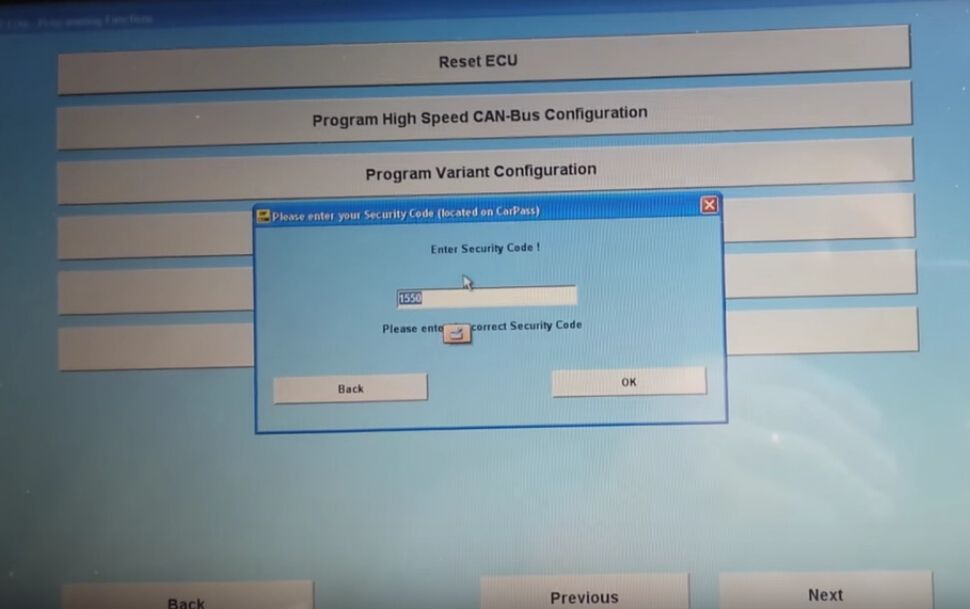
Then, choose “Reset ECU” and you need to enter security code. Enter then click OK.
Wait and it will show “Reset completed successfully”

Now car’s immobilizer light is blink. Choose “Body”→ “Programming”→ “Immobilizer Programming”
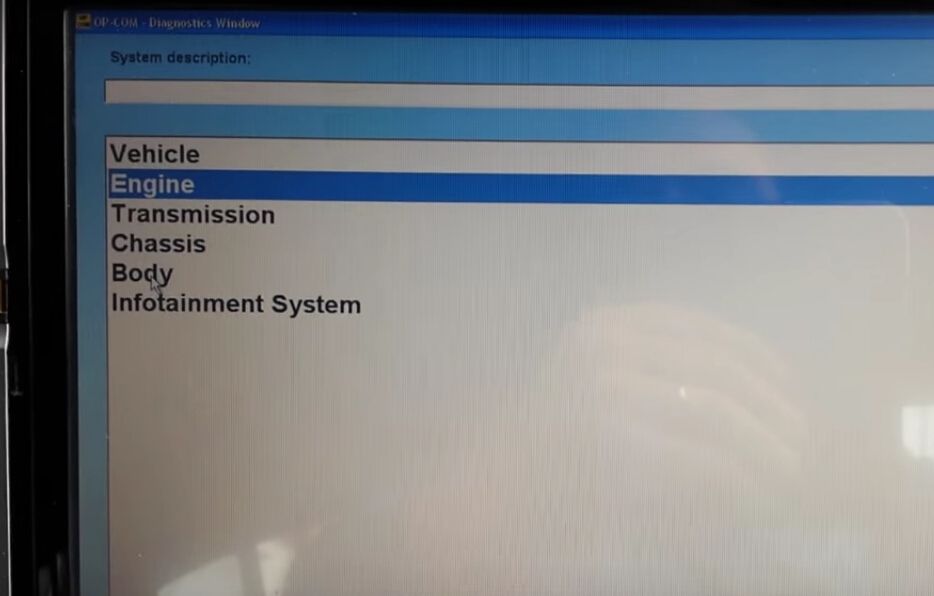
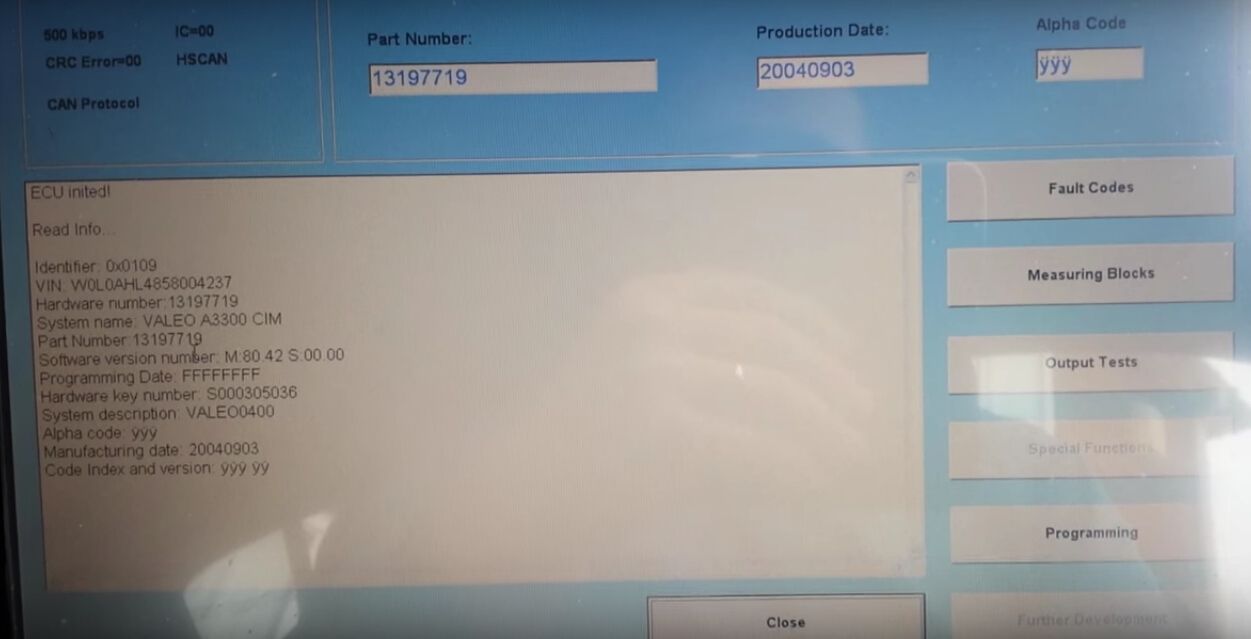
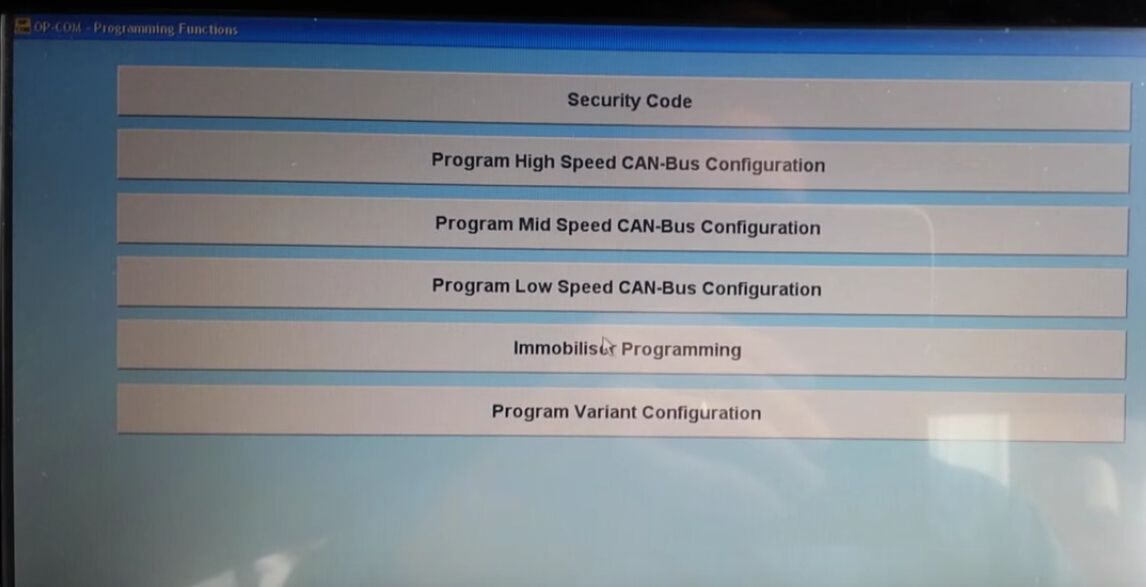
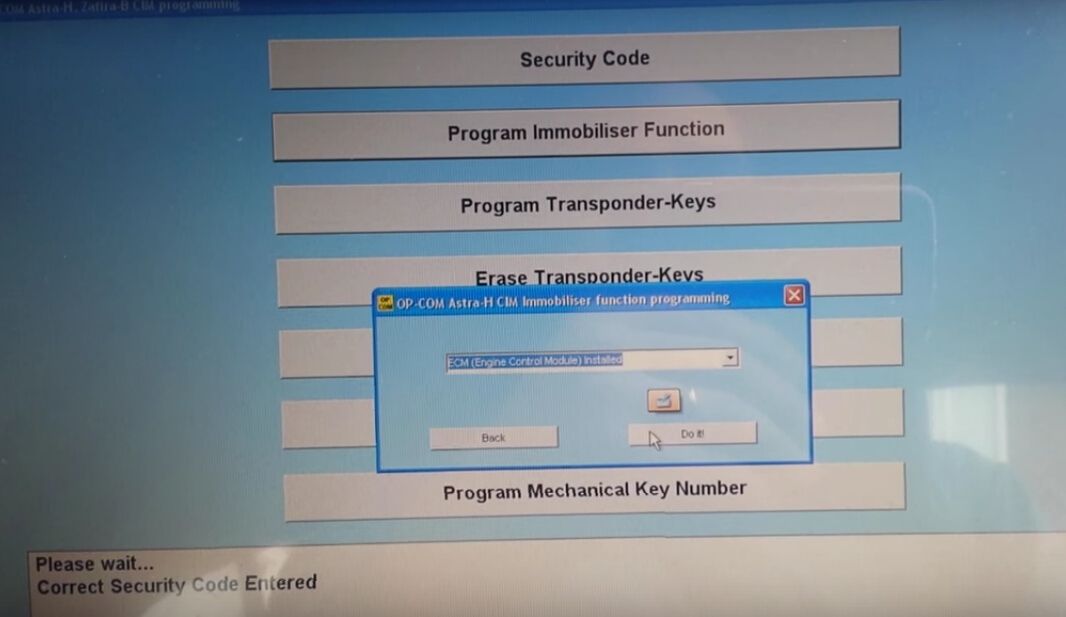
Click “Security Code” and enter security code. Click “Program Immobilizer Function”, choose “ECM” option and click “Do It”.
Turn to main menu and choose “Fault Codes”. OPCOM software will display fault codes.
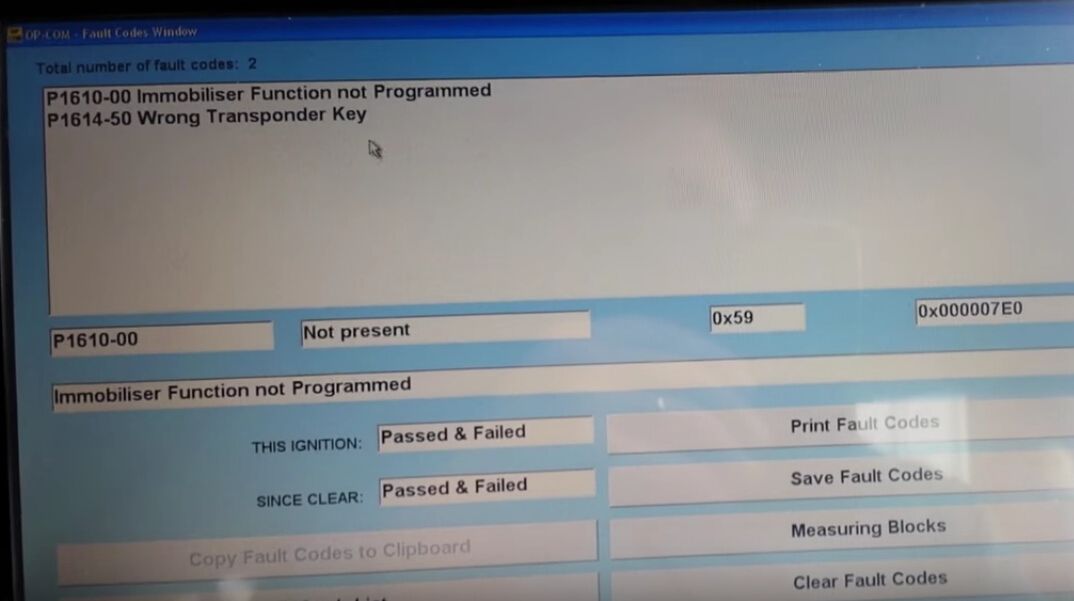
Click “Clear Fault Codes” and the code “P1614-50 Wrong Transponder Key” still exist. Then you need to remove key and plug it in again. Now all codes are cleared and car’s immobilizer light is off.

Now all things done! OPCOM diagnostic tool reset Vauxhall Astra H 2004 ECU immobilizer successfully.
OBDSTAR H111, an 2018 new Opel key programmer & cluster calibration with a coverage more than 90% Opel models, is now available in eobdtool.co.uk!
How use OPCOM to reset and reprogram Vauxhall Astra H ECU?
This is a guide to reset and reprogram Vauxhall Astra H 2004 ECU immobilizer using OP-COM. Get cheap $18.99 OP-COM diagnostic tool to fully diagnose and program Opel or Vauxhall Vectra-C, Astra-H, Zafira-B…

First, connect OPCOM with car and laptop. Open OPCOM software. Choose “2014”→“Astra-H”→ “Engine”→ “Z 16 XEP”

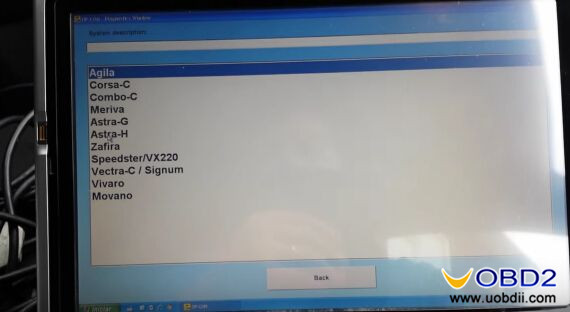
Follow the tip and click “Next”
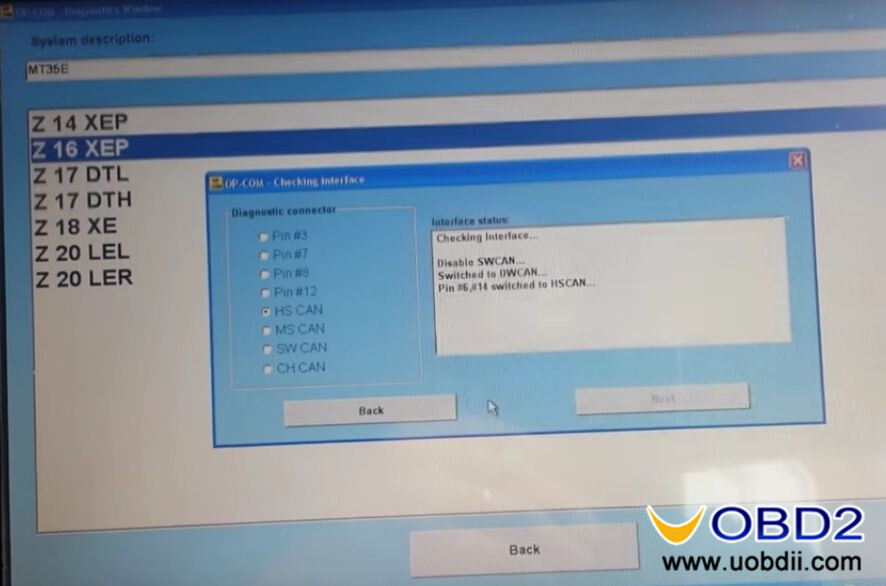
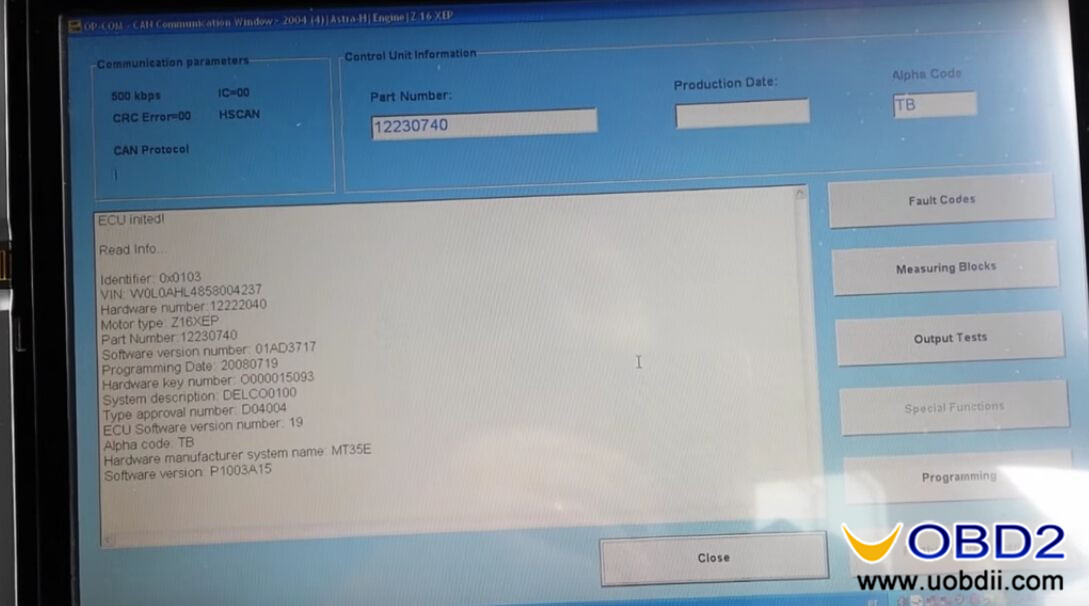
Then, choose “Reset ECU” and you need to enter security code. Enter then click OK.

Wait and it will show “Reset completed successfully”
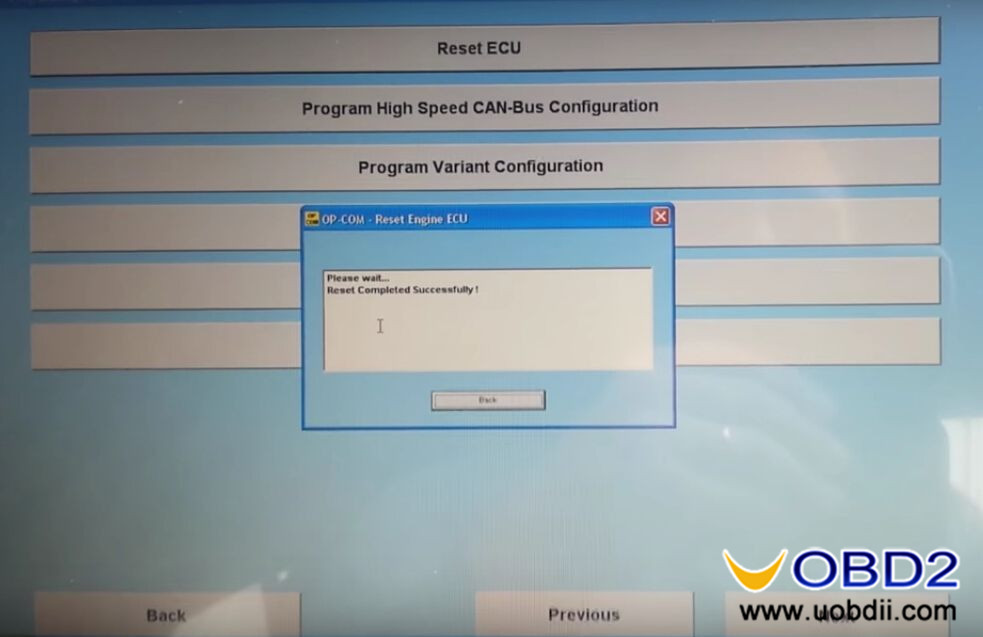
Now car’s immobilizer light is blink. Choose “Body”→ “Programming”→ “Immobilizer Programming”

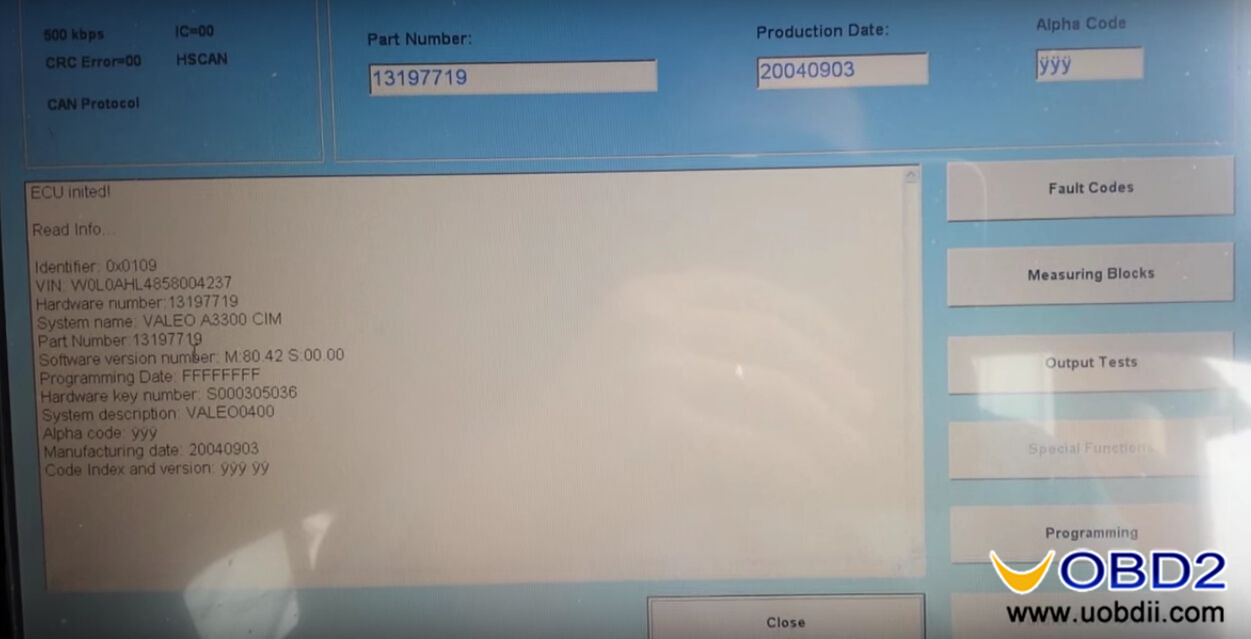

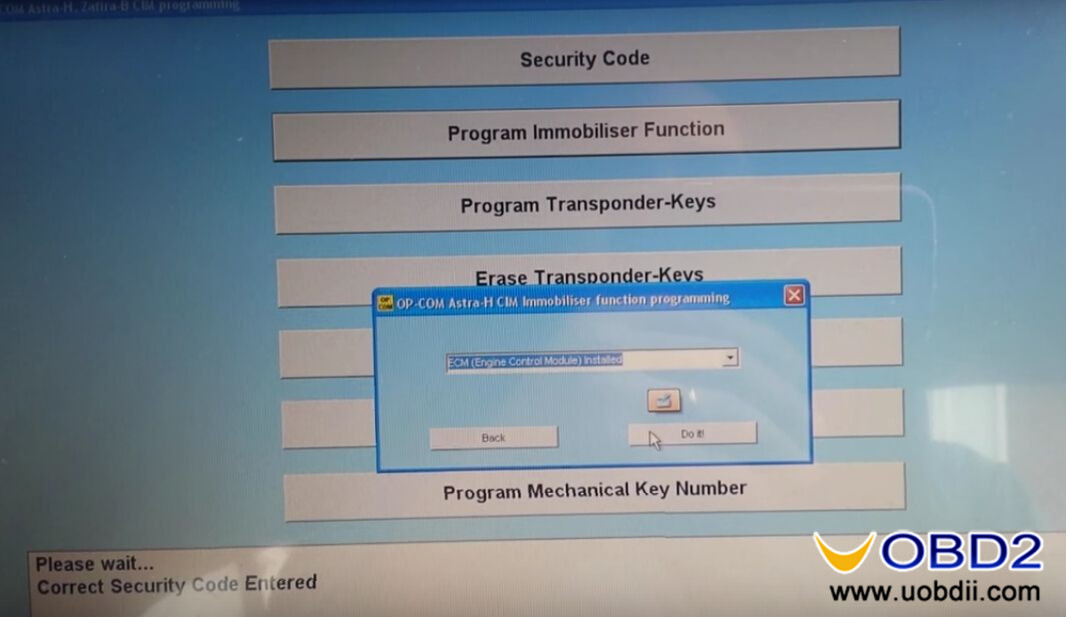
Click “Security Code” and enter security code. Click “Program Immobilizer Function”, choose “ECM” option and click “Do It”.
Turn to main menu and choose “Fault Codes”. OPCOM software will display fault codes.

Click “Clear Fault Codes” and the code “P1614-50 Wrong Transponder Key” still exist. Then you need to remove key and plug it in again. And all codes are cleared and car’s immobilizer light is off.
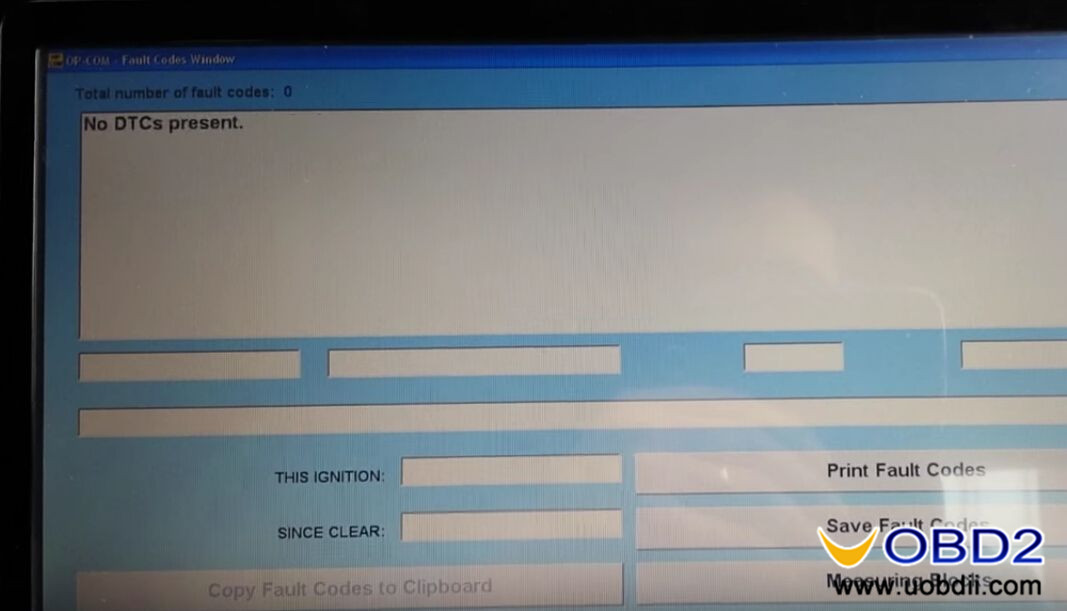
Now all things done! OPCOM reset and reprogram Vauxhall Astra H 2004 ECU immobilizer successfully!

Related posts:
- Free Download Op-com Can OBD2 FW 1.99 Opel Diagnostic Tool
- How does OPCOM OP-COM program Opel Corsa C BCM? (Guide)
OP-COM Guide: How to use Opcom to do Key Programming
. To program Opel keys with Opcom clone, you need LUCK.
What is Opcom?
Opcom is a PC-based diagnostic tool for Opel. Now there are 4 versions of Opcom in the market, incl.
What is immobilizer ii programming?
From 1995 and onwards, Opel/Vauxhall vehicles are factory installed with an immobiliser.
The Immobiliser-I system can be found in Astra-F, Corsa-B, Omega-B, Vectra-B.
The Immobiliser-II system can be found in Astra-G, Corsa-C, Omega-B, Vectra-B, Zafira,
This opcom guide covers the Immobiliser-II system.
With OP-COM you can perform various immobiliser related operation.
OPCOM how to:
– Erase all transponder keys
– Learn transponder keys to immobiliser
– Reset engine ECU
– Reset immobiliser ECU
– Replace engince ECU
– Program immobiliser output
– Program security code
– Program mechanical key number (MKN)
– Program vehicle identification number (VIN)
Please note, that any immobiliser-related operation requires a security code.
The security code can be found in the Car Pass.
You should get the Car Pass from the dealer, or the previous owner, along with all the vehicle
papers (owners manual, service book, etc.) It contains the VIN, security code, the engine
type, radio code, etc.
Also, you can read security codes yourself.
Opcom v1.39 can read security codes and program keys in one device. But, unluckily, it stops production.
Opcom v1.59 can program keys also, but you need use Carprog v8.21 or CarProg 10.05 to read pin /security codes from engine ECU.
The security code has four digits, and it only contain numbers, from 0 to 9.
If you do not have the Car Pass, you should visit the dealer, where you can request a new Car
Pass. First, they will verify your papers, and if everything is all right, you’ll get a new Car
Pass. It costs you some money, but at least you will get the security code.
In this demonstration, we use a MY 2001 Astra-G, Engine Z 16 XE.
First, you can easily check that the vehicle is immobiliser equipped. Please look in the engine
ECU measuring blocks, where you’ll find the answer.
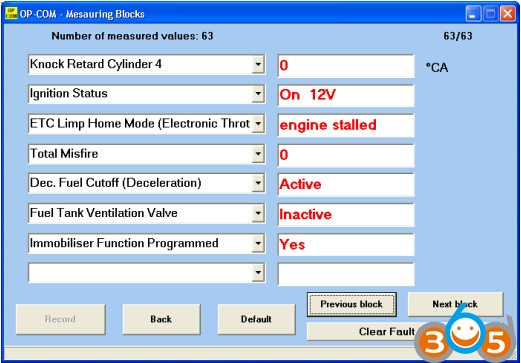
As you can see, Immobiliser Function Programmed = Yes .
When you open up the Immobiliser, you can see the following:
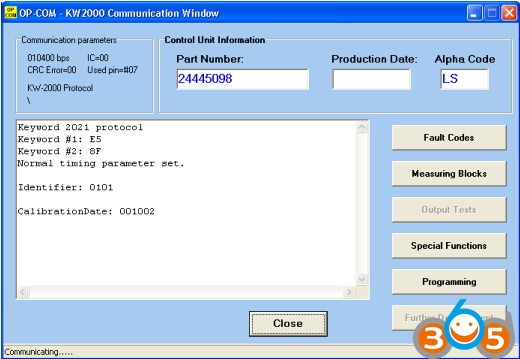
You can easily verify the correct operation, or the state of the Immobiliser, please click on the
[Measuring Blocks] button.
For the immobiliser system, you can program up to five keys.
On this example, you can see, that only one key is programmed.
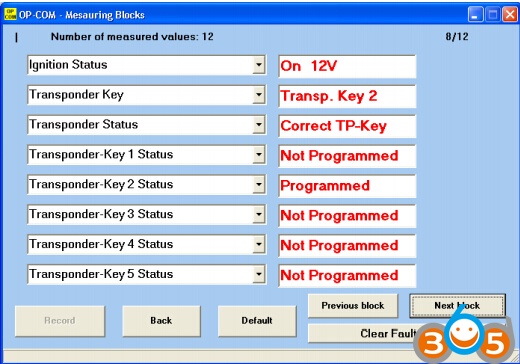
The immobiliser and the Engine ECU is connected together via a W-Line.
(W comes from a german word, WegfahrSperre=Immobiliser)

The security wait time is also important, because when a wrong security code has been
entered, the system will lock up itself, for some time. In that case, you have to wait, and try
again only, if the Security Wait Time is inactive here. Possible values can be anything from
10 seconds, to 21 hours! If you somehow managed to create a long Security wait time, please
connect a battery charger to the car, and leave the ignition on.
Possible Security Wait Times intervals: (hh:mm:ss)
00:00:10, 00:10:00, 00:20:00, 00:40:00
01:20:00, 02:40:00, 05:20:00, 10:40:00
(Yes! 21 hours, 20 minutes can be the longest one here �� )
Under the [Special Functions], you can
– Read ECU Identification
– Reset Engine ECU
– Erase Transponder Keys (all)
The Read ECU Identification button is not grayed out. This function does not require any
security code, and you can read out the vehicle VIN, and the MKN for identification
purposes. You’ll need the VIN, and the MKN, when you order new keys to the car.

First, you have to enter the Security code, to enable the buttons.
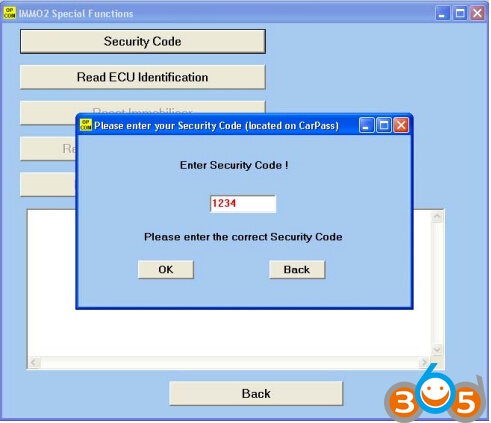
When a correct security code has been entered, all the options will be available.
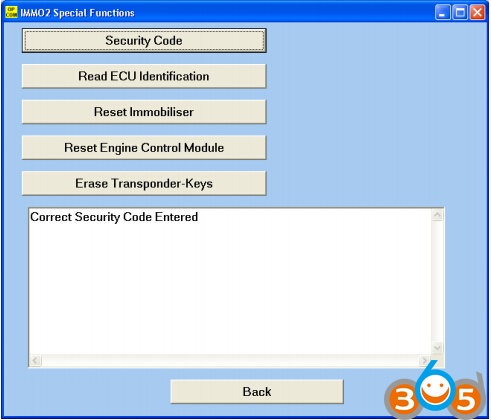
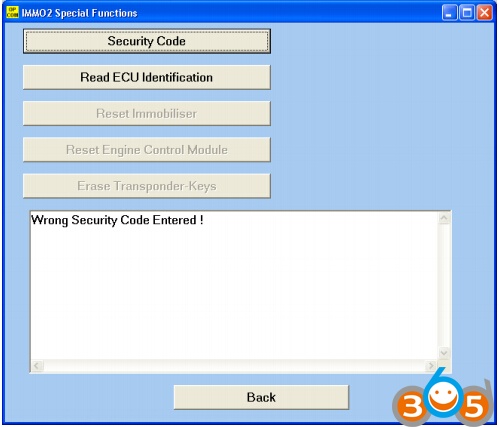
When a wrong security code has been entered, the program notifies you, and all the relevant
options will be grayed out.
So, lets see each function in details:
[Op com Reset Immobiliser]
This function will set back the immobiliser ECU to its factory default state. Prior to replace,
you have to reset the immobiliser back to its factory default state. In this way, you can install
it into another car. This will also erase all transponder keys. Please note, that after using this
function, you won’t be able to start the engine.
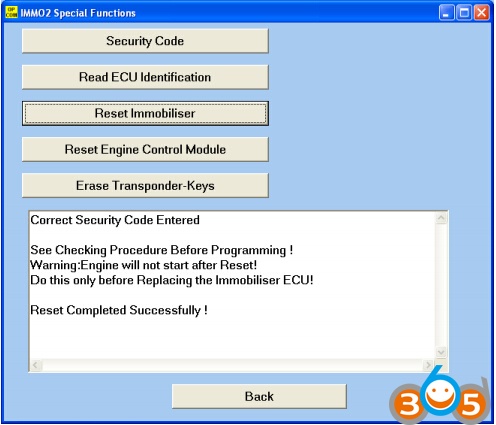
After the reset is done, you can verify in the measuring blocks, that all key entries erased
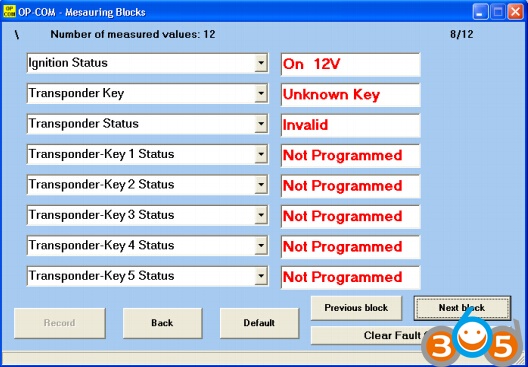
In a factory default state, the immobiliser ECU will accept ANY secret code.
[Opcom Reset Engine Control Module]
This function will set back the Engine Control Module to its factory default state. Prior to
replace, you have to reset it back to its factory default state. In this way, you can install it into
another car. You can verify the state of the engine ECU immobiliser in the measuring blocks
information. Please note, that after using this function, you may won’t be able to start the
engine. Each factory default state Engine ECU has some limited running time, without
immobiliser (max 10 attempts to be exact). After that number, the Engine ECU will lock
itself, and no more start is allowed without a fully functioning immobiliser. On Corsa-C,
Meriva, and Tigra-B the BCU, and the instrument cluster is also an Immobiliser related
component. OP-COM is going to support resetting, and programming these ECU’s in one of
the next release.

Before you swap, or replace any immobiliser related component
(Engine ECU, Immobiliser ECU), you have to Reset them first.
The arming of the immobiliser has some delay (usually 5-10 min), so within five or ten
minutes, you may be able to start the car. But after this delay expires, you wont be able to
start the engine at all, as the immobiliser will lock the vehicle. An indicator light (SVS, or
MIL) will be flashing on the dash, showing an immobiliser related problem.
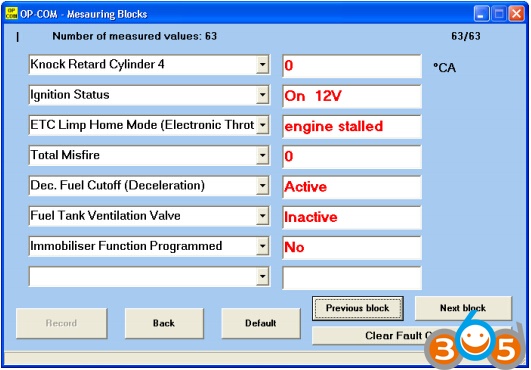
When you intended to buy used engine or Immobiliser ECU, make sure that either
– you will get a valid security key, or Car Pass with the used unit, or
– the used parts were correctly set back (resetted)
[Op-com Erase Transponder Keys]
With this function, you can erase all transponder keys. The function is useful, for example
when your costumer purchases a used car, with three programmed keys, but he/she only has
one, or two in his/her hands. In that case, you can Erase all transponder keys, and only
reprogram those keys, which your costumer has.
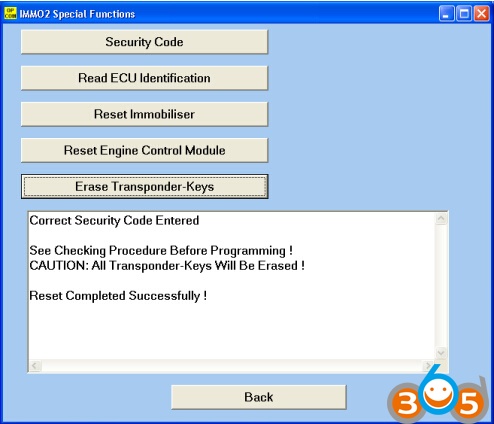
This will not erase the programmed remote controls for the car. Erasing programmed remote
controls can be done in Alarm, or Central Door Locking, depending on which equipment is
built into the car.
Under the [Programming] menu, you can
– Program Immobiliser Function
– Program Immobiliser Output
– Program Transponder-Keys (New, and Old)
– Program Vehicle Identification Number (VIN)
– Program Mechanical Key Number (MKN)
After you successfully entered a valid security code, all the available options will be active.
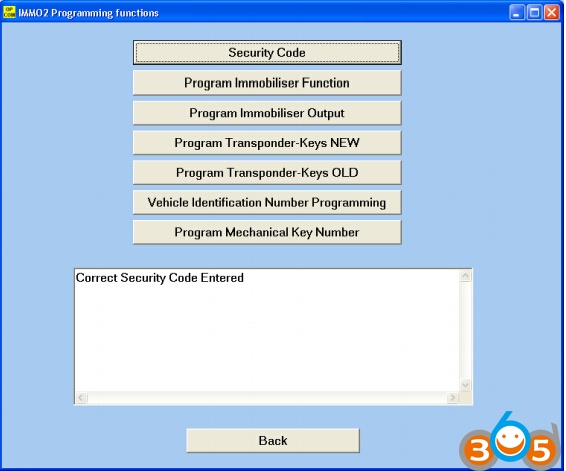
A new transponder key can only be programmed once to an immobiliser ECU. At the first
programming attempt, the immobiliser writes its own data (Secret Code, VIN, etc) into the
transponder, and then the transponder will be locked to that specific immobiliser. Although,
any programmed keys, can be erased, and reprogrammed to the same car without any
problem, a programmed transponder cannot be reprogrammed to another car, or to another
immobiliser ECU. The immobiliser is fully functional, when all the components have the
same VIN, and Secret Code.
An already programmed Immobiliser-II type transponder key can be programmed to a
different Immobiliser-I type Immobiliser ECU, without any problem.
Let’s see each function in details:
[Opcom Program Immobiliser]
When you replace an immobiliser, or an engine ECU, or both, you can use this function to
program the replaced component(s). When you click on the button, you will see, that it has
– Immobiliser installed (replaced)
– Engine Controller installed (replaced)
– Both Immobiliser and Engine Controller installed (replaced)
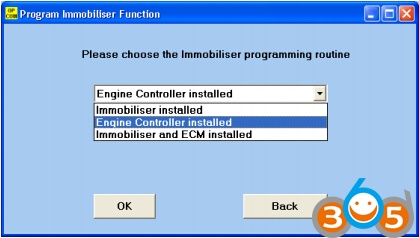
Please choose accordingly what you did replaced, then please press the [OK] button.
When you replaced the Immobiliser, you should see something like this:
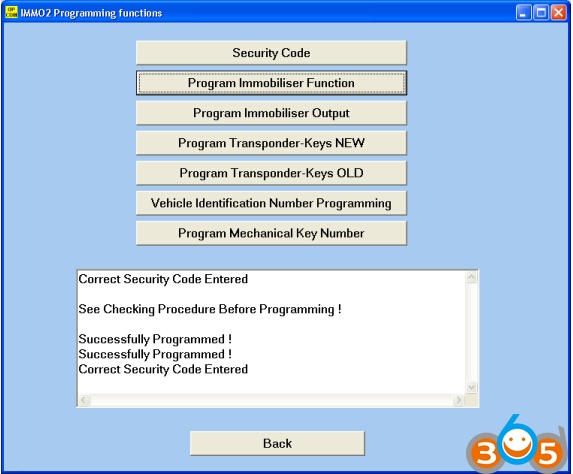
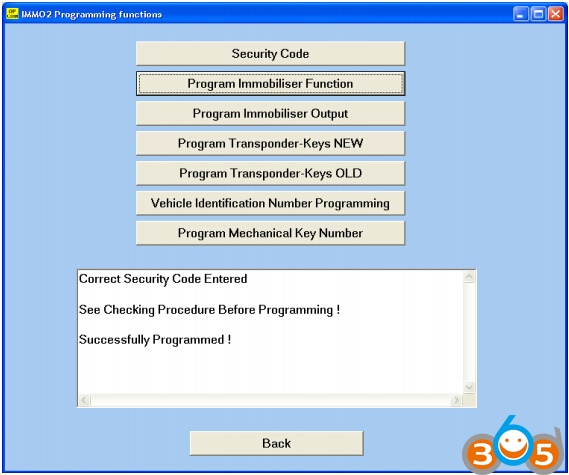
When you replaced the Engine Control Unit, you should something like this:
When you replace both Engine and Immobiliser ECU, both programming routine will be
executed after each other. First, the Immobilser ECU will be programmed with the Secret
Code, VIN, and MKN, then a new Engine ECU will be adapted to the system.
After you successfully finished the Immobiliser programming function, you have to program
at least one key to the immobiliser system.
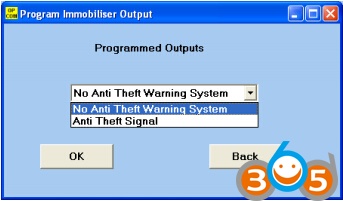
[OP-COM Program Immobiliser Output]
When the car is equipped with an Anti Theft Warning System (Alarm), you should program
the immobiliser output accordingly.
[OPCOM Program Transponder Key – NEW]
With this function, you can program NEW, not previously programmed key(s) to the
immobiliser system. Only one key can be programmed at once. After each key, please cycle
the ignition. If you want to program two, or three keys, please repeat the procedure.
[OP CPM Program Transponder Key – OLD]
With this function, you can program OLD, previously already programmed key(s) to the
immobiliser system. Only one keys can be programmed at once. After each key, please cycle
the ignition. If you want to program two, or three keys, please repeat the procedure.

If the program gives you the following message:
then please check the measuring blocks for more information about your transponder-key.
The reasons could be as simple as
– wrong transponder type
– key contains no transponder at all (dropped out from key, etc.)
– transponder already programmed to other car
– Wrong transponder-key programming routine selected (trying to program a
previously programmed transponder as a new one)
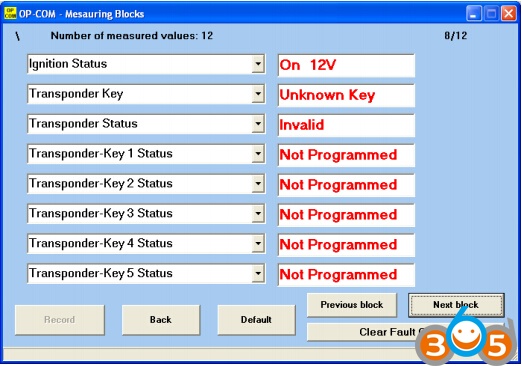
Next, you will see some example pictures, I hope these can helps you to identify
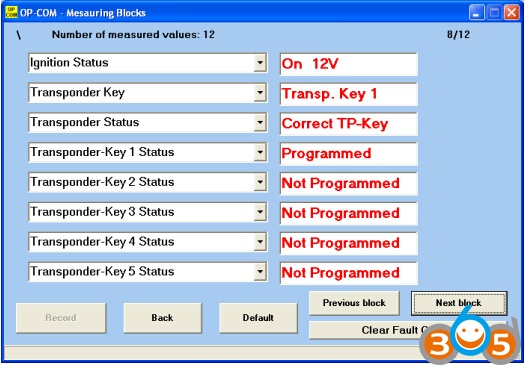
the problem more easily. When the immobiliser system working perfectly, the Transponder
status must be Correct TP-Key.
Transponder identification OK, system working properly:
Key does not contains valid transponder:
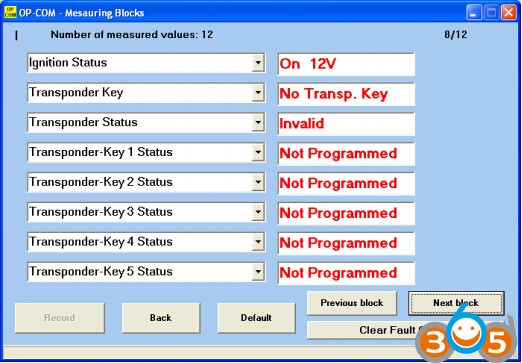
Key contains a transponder (new, or previously programmed):
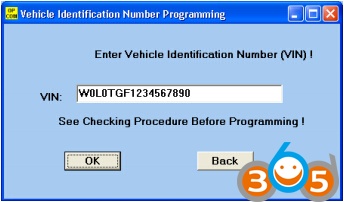
[OP-COM Program Vehicle Identification Number (VIN)]
With the help of this function, you can program the VIN of your car into the immobiliser
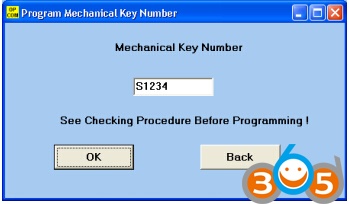
[OPCOM Program Mechanical Key Number (MKN)]
With the help of this function, you can program the MKN of your car into the immobiliser
ECU. This information is helpful, when you want to order some spare keys to your car, and
you can only order fine, mechanically working keys to your car, if you know the Mechanical
Summary:
In this guide, we wanted to summarize you what OP-COM can do with the immobiliser.
The most Important note:
Please, First always read the factory repair manual of your car!
There are some steps, which require great attention from the user. Please, take your time, do
not rush, and think it over at least twice, which functions do you chooses.
Do not click automatically on OK, if you don’t know what’s going to happen.
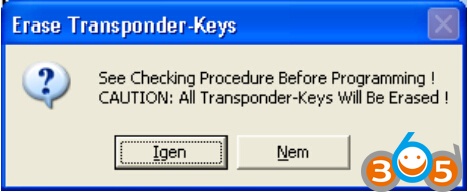
You cannot do any harm accidentally, because every important step has its own safety warning
I hope you will find something helpful in this opcom manual. You need luck with key programming by Opcom china clone: http://www.obdii365.com/producttags/opcom.html Anyway, a HQ opcom is a must! Good luck!
Related posts:
- Free Download OPCOM fw1.64 with vaux-com 120309a
- How to Install OPCOM 1.59 v1.65 v1.7 VAUX-COM 120309a on Windows 7
- How to Install Opcom V1.95 VAUX-COM Software Driver on Windows 7
- How to Modify Opcom Type B to Type C with CH-CAN Support?