Getting Started
CocoaPods manages library dependencies for your Xcode projects.
The dependencies for your projects are specified in a single text file called a Podfile. CocoaPods will resolve dependencies between libraries, fetch the resulting source code, then link it together in an Xcode workspace to build your project.
Ultimately the goal is to improve discoverability of, and engagement in, third party open-source libraries by creating a more centralised ecosystem.
Google have created a great overview for Route 85 video series going through this entire guide and more.

CocoaPods is built with Ruby and it will be installable with the default Ruby available on macOS. You can use a Ruby Version manager, however we recommend that you use the standard Ruby available on macOS unless you know what you’re doing.
Using the default Ruby install will require you to use sudo when installing gems. (This is only an issue for the duration of the gem installation, though.)
$ sudo gem install cocoapods If you encounter any problems during installation, please visit this guide.
If you do not want to grant RubyGems admin privileges for this process, you can tell RubyGems to install into your user directory by passing either the —user-install flag to gem install or by configuring the RubyGems environment. The latter is in our opinion the best solution. To do this open up terminal and create or edit your .bash_profile with your preferred editor. Then enter these lines into the file:
export GEM_HOME=$HOME/.gem export PATH=$GEM_HOME/bin:$PATH Note that if you choose to use the —user-install option, you will still have to configure your .bash_profile file to set the PATH or use the command prepended by the full path. You can find out where a gem is installed with gem which cocoapods . E.g.
$ gem install cocoapods --user-install $ gem which cocoapods /Users/eloy/.gem/ruby/2.0.0/gems/cocoapods-0.29.0/lib/cocoapods.rb $ /Users/eloy/.gem/ruby/2.0.0/bin/pod install To update CocoaPods you simply install the gem again
$ [sudo] gem install cocoapods $ [sudo] gem install cocoapods --pre If you originally installed the cocoapods gem using sudo , you should use that command again.
Later on, when you’re actively using CocoaPods by installing pods, you will be notified when new versions become available with a CocoaPods X.X.X is now available, please update message.
Using a CocoaPods Fork
There are two ways to do this, using a Gemfile (recommended) or using a development build that are in discussion or in implementation stage.
Head over to Using CocoaPods for details on the usage of CocoaPods.
- Home
- Using CocoaPods
- Getting Started
Как установить cocoapods на mac m1
Some suggestions: Make sure that all words are spelled correctly. Try different keywords. Try more general keywords. Split long words into pieces.
What is CocoaPods
CocoaPods is a dependency manager for Swift and Objective-C Cocoa projects. It has over 98 thousand libraries and is used in over 3 million apps. CocoaPods can help you scale your projects elegantly.
CocoaPods is built with Ruby and is installable with the default Ruby available on macOS. We recommend you use the default ruby.
Using the default Ruby install can require you to use sudo when installing gems. Further installation instructions are in the guides.
$ sudo gem install cocoapods
Search for pods (above). Then list the dependencies in a text file named Podfile in your Xcode project directory:
platform :ios, '8.0' use_frameworks! target 'MyApp' do pod 'AFNetworking', '~> 2.6' pod 'ORStackView', '~> 3.0' pod 'SwiftyJSON', '~> 2.3' end
Tip: CocoaPods provides a pod init command to create a Podfile with smart defaults. You should use it.
Now you can install the dependencies in your project:
$ pod install
Make sure to always open the Xcode workspace instead of the project file when building your project:
$ open App.xcworkspace
Now you can import your dependencies e.g.:
#import
Sometimes CocoaPods doesn’t yet have a pod for one of your dependencies. Fortunately, creating a pod is pretty easy:
$ pod spec create Peanut $ edit Peanut.podspec $ pod spec lint Peanut.podspec
You can find a lot of information on the process in the guides. When you’re done you can get an account and push your pod to the CocoaPods Trunk.
Contribute
We’re developing CocoaPods on GitHub. There’s a guide for getting started on the CocoaPods tool. It’s easy and really gratifying to contribute patches! — for a lot of people it’s their first foray into Open Source. We have some easy tickets to look at.
Install Cocoapods on M1 and M2 Macbook easily without Errors
Installing CocoaPods on Apple Silicon chip M1 and M2-based Macbooks has become a headache for many as it throws several errors during the installation process.
Additionally, Cocoapods have compatibility issues with silicon chip Macbooks M1 and M2, so Cocoapods can’t be directly installed.
Here is a step-by-step guide to install Cocoapods on M1 and M2 chip-based Macbooks without errors.
Step 1: Go to the HomeBrew website and copy the command to install HomeBrew using Terminal as we need HomeBrew to install Cocoapods on Macbook M1 and M2.

Step 2: Paste the copied bash command in a macOS Terminal and hit enter.
During installation, it will ask for the Password of your device and will ask you to press Enter to continue.
As soon as HomeBrew is installed, the terminal might show a warning like this, asking you to follow the “Next Steps”, which are displayed in the terminal itself as “Next steps”.
In the Next Steps instruction, there are two bash commands
Step 3: Copy and Paste the first command fully into your terminal and run it. your terminal which includes the local path in your device to the .zprofile.
Step 4: Copy and Paste the Second command in the terminal and run it
This will successfully install HomeBrew on your Macbook.
Note: To check if homebrew is properly installed, run the command brew help
Step 5: After that type brew install cocoapods. This will install Cocoapods in your M1 Macbook or M2 Macbook based on Apple Silicon chips.
This will successfully install Cocoapods on your Macbook.
Installing Cocoapods on M1 Macbook Air, Big Sur
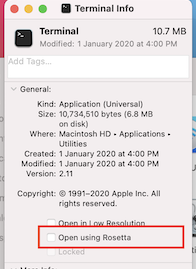
I have just gotten the new device around 2 weeks ago. As a mobile developer, I try to compile my Xcode project after installing Cocoapods with sudo gem install cocoapods to the device. To my surprise, pod install does not work as expected this time.
Errors
I ended up seeing something as such
LoadError — dlopen(/Library/Ruby/Gems/2.6.0/gems/ffi-1.15.0/lib/ffi_c.bundle, 0x0009): missing compatible arch in /Library/Ruby/Gems/2.6.0/gems/ffi-1.15.0/lib/ffi_c.bundle — /Library/Ruby/Gems/2.6.0/gems/ffi-1.15.0/lib/ffi_c.bundle /System/Library/Frameworks/Ruby.framework/Versions/2.6/usr/lib/ruby/2.6.0/rubygems/core_ext/kernel_require.rb:54:in `require’ /System/Library/Frameworks/Ruby.framework/Versions/2.6/usr/lib/ruby/2.6.0/rubygems/core_ext/kernel_require.rb:54:in `require’ /Library/Ruby/Gems/2.6.0/gems/ffi-1.15.0/lib/ffi.rb:6:in Enter fullscreen mode
Exit fullscreen mode
Solutions Available:
As more and more developer tools start to support M1 natively, I would go for a native option, unless there isn’t any better option. As it turns out, Apple Silicon (Big Sur) is supported with stable version!